Getting Started with Couchbase Enterprise Analytics SDK

Introduction

Couchbase Enterprise Analytics is a new server from Couchbase that specializes in complex queries on data from multiple sources. It’s not an operational database, but a highly scalable and flexible reporting database that is optimized for cloud and AI use-cases using JSON as its data storage type. It’s classified as a Columnar database which are a type of database optimized for data-warehousing and analytics.

In this post, I will concentrate not on what the Couchbase Enterprise Analytics is or does, but on using the new Couchbase Enterprise Analytics SDK – new SDK for connecting to and running queries against the Couchbase Enterprise Analytics Server.

A Little History

Couchbase actually has a couple of “Analytics” products:

  • Capella Analytics- A cloud based data-base-as-a-service (DBaaS) that is based upon a column-orientated Log-Structured (LSM) b-tree structured storage engine that expands the Capalla cloud service for AI and advanced workflows.
  • CBAS (Couchbase Analytics Service) – that runs on-premise and specializes in operational and real-time reporting. This is the original Couchbase Analytics and it runs as a server on a traditional Couchbase cluster similar to the Query service, but with a different focus on reporting.
  • Finally, Couchbase Enterprise Analytics which runs as a separate cluster and service and is specialized towards AI and ML workflows, advanced reporting in a highly scalable fashion combining multiple data sources into a single platform.

Which one use is dependent on your application or use-case with CBAS intended for smaller, more simpler implementations, Capella Analytics to allow the flexibility of the cloud with respect to scaling and quickly tailoring resources to your usage – think AI, and Analytics Enterprise when you need a enterprise worthy work-horse designed for data and resource intensive AI/ML applications.

The Couchbase Enterprise SDK

This is a new SDK, completely different from the traditional Couchbase SDK used by both the Capella Analytics/Columnar and CBAS. The API is superficially very similar. If you have experience with the operational SDK, you can leverage that expertise.

Note that the Operational SDK will not work with the Couchbase Enterprise Analytics Server. Similarly, the Enterprise Analytics SDK does not work with Capella Analytics or CBAS.

The Couchbase Analytics SDK has support for GOlang, C++, Java, Python etc, however, in this post I will concentrate on the .NET version written in C# and currently available as a release candidate (RC) for .NET10.

You can find the package in NuGet or you can pull the source from Github. Note that this is a new release. If you have any issues, you can get help on Couchbase Forums. You can also ask questions on Stack Overflow or report it as a Github issue.

Installing Couchbase Enterprise Analytics Server

The easiest way to get up and running with the Couchbase Analytics Server is via docker and S3Mock as a storage back end. Detailed directions on how to do this can be found on the Couchbase Enterprise Analytics website.Follow the step-by-step tutorial first before continuing with the rest of the article if you wish to get your hands on it, otherwise keep reading!

Note that you will have to load the Travel-sample dataset and you will also have to connect to it as a datasource.

Create a Dotnet Project

Using your favorite editor or IDE, start by creating a .NET solution and project (if you need a reference checkout out the CLI docs):

> mkdir Analytics.Example

> cd Analytics.Example

> dotnet new console

Next you will add the NuGet package reference to the project for Couchbase.Analytics:

> dotnet add package Couchbase.AnalyticsClient --version 1.0.1

Using your favorite editor or IDE open the Program.cs file so that you can write some Analytics code:

> code Program.cs 

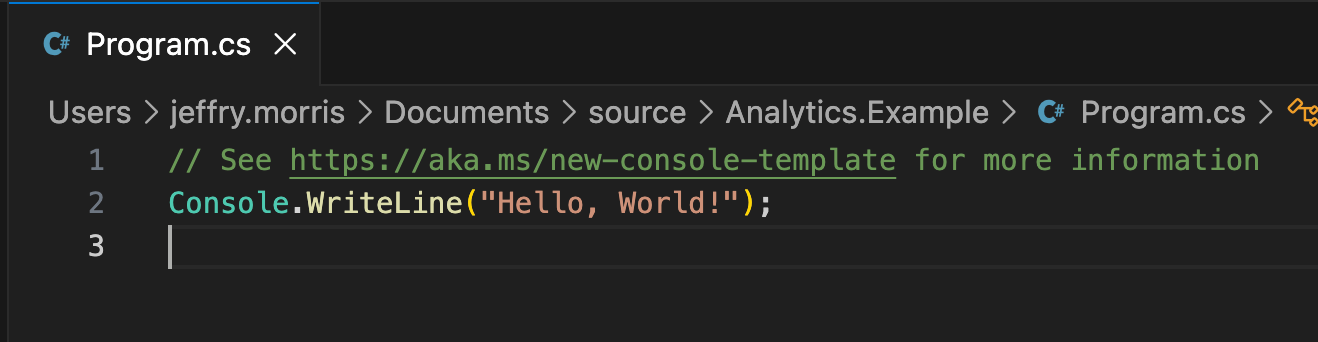
You should see something like this:

Remove the auto-generated code an add the following namespaces:

using Couchbase.AnalyticsClient;

using Couchbase.AnalyticsClient.Exceptions;

using Couchbase.AnalyticsClient.HTTP;

Then add the following to the `Main` method’s body:

var cluster = Cluster.Create(“http://localhost:8095”, new Credential(“Administrator”, “password”));

This creates an instance of the `Cluster` class that can be used to execute SQL++ queries against the Couchbase Enterprise Analytics cluster. Then add the following code so that we execute a query against the database:


var query = "SELECT count(*) AS airport_count, country\n" +

           "FROM `travel-sample`.`inventory`.`airport`\n" +

           "WHERE country = 'United States'\nGROUP BY country;";

var result = await cluster.ExecuteQueryAsync(query);

await foreach (var row in result.Rows)
{
   Console.WriteLine(row.ContentAs<dynamic>().ToString());
}

Finally, let’s build and run the application:

> dotnet build 

> dotnet exec Analytics.Example

The output to the console should look like this:

{"airport_count":1560,"country":"United States"}

If you receive an error you may want to check that the Analytics Cluster is running and that your credentials are correct. If you followed the “getting started” directions, it should work as planned.

ClusterOptions

The client takes a number of different optional parameters; note these are not 1:1 with options available in the Operational Analytics SDK.

ParameterDescriptionDefault
SecurityOptionsSettings for various certificate authentication settings.Uses the development certificate which comes with the SDK.
TimeoutOptionsSettings for dispatch, connect and query timeoutsDispatchTimeout: 30s
ConnectTimeout: 10s
QueryTimeout: 10m
MaxRetriesThe number of times a retry attempt will happen before failure7 retries
DeserializerOverride the default deserializer with a custom one.System.Text.Json
LoggingOverride the default ILoggerFactoryNullLogger

QueryOptions

There are also optional parameters for executing a query via ExecuteQueryAsync:

ParameterDescriptionDefault
AsStreamingAllow the results to be streamed to the client avoiding large memory allocationstrue
TimeoutSets a timeout for the queryClusterOptions.Timeout (10m)
ClientContextIdA guid for correlating queriesIf empty a new guid will be used
NamedParametersNamed parameters for the querynull
PositionalParametersPositional parameters for the querynull
ScanConsistencyThe tradeoff between data staleness and performanceNotBounded. – The default which means that the query can return data that is currently indexed and accessible by the index or the view. The query output can be arbitrarily out-of-date if there are many pending mutations that have not been indexed by the index or the view. This consistency level is useful for queries that favor low latency and do not need precise and most up-to-date information.
DeserializerOverride the default deserializer with a custom one.System.Text.Json
ReadOnlyWhether the query is read onlyfalse
MaxRetriesMaximum number of times to retry a query (when the error is retryable).7

Conclusion

The Couchbase Enterprise Analytics SDK is the official means of interacting with Couchbase Enterprise Analytics Server. The server is a columnar database suitable for high-performance OLAP applications and especially for AI/ML use-cases.

Getting Started with EF Core Couchbase DB Provider

Introduction

Note: This post is part of C# Advent 2024

In fall of 2024, Couchbase, the NoSQL cloud data developer platform, released a developer preview of their upcoming EF Core Couchbase DB Provider. This Entity Framework Core provider is similar in functionality to the popular SQL Server EF Core Database Provider and its relatives for various other RDBMS, such as MySQL and Oracle.

EF Core is a lightweight, extensible, open source and cross-platform version of the popular Entity Framework data access technology”.  Importantly, it is an Object Relation Mapper aka ORM, which does two core things:

  • Allows developers to use a database using .NET objects (aka POCOs for “plain old CSharp objects” or entities).
  • Eliminates the need for any RDBMS specific code to be written as its an abstraction over the database and its specific APIs

You will not need to know much about EF Core to understand this post, but if you want to learn more you can do so on the EF Core developer docs.

In this post you will learn about creating a Couchbase Capella Cloud database and how to connect to it using the Couchbase EF Core DB Provider. You will then learn how to perform CRUD (Create, Read, Update and Delete) operations on your .NET objects, storing them as JSON documents in the database. Finally, you will learn how to query your stored JSON documents and hydrate your .NET objects using Linq to SQL queries which are translated to the SQL++ language by the EF Core Couchbase DB Provider.

Getting Started

Creating the Bucket

For these examples, you will be using a Couchbase Capella free tier database (if you already have a cluster setup you can skip this step, but you do need the “Content” Bucket, the “Blogs” Scope and the two Collections, “Blog” and “Post”). Directions for signing up with an account can be found in the Couchbase Capella documentation. Once you have created an account you will want to create a free Operational Cluster. You can follow the directions and do this, it should only take a few moments.

My suggestion is to use the defaults and once this page opens, just click the “Create Cluster” button. 

At this point the cluster will be created and deployed, this may take several minutes to complete. You will need to wait until this is complete before moving to the next step.

Once this is done, click on the cluster’s name, in this case “emeralvinodham”, but yours will be different. This will open up the main view to the cluster. Next click on the “Create” button in the upper left-hand side:

A modal dialog will appear and allow you to create the Bucket, Scope and Collection. The Bucket name will be “Blogs”, the Scope name will be “MyBlog” and the Collection will be “Blogs”. Once you do this click the “Create” button on the modal dialog.

Once the dialog closes, click the “Create” button again on the upper left-hand side. When the dialog opens, you will add another Collection called “Posts” to  the existing Bucket “Blogs” and the existing Scope “MyBlogs”.

Once you have filled in the fields, click the “Create” button and the “Posts” Collection will be added to the “MyBlogs” Scope. 

Do note that the names are case sensitive, so if you create a Collection named “posts” then you will run into problems later as JSON and SQL++ are case sensitive. This applies to the Bucket and the Scope names as well.

After you have done this, you will have two Keyspaces that look like this: `Content`.`Blogs`.`Blog` and `Content`.`Blogs`.`Post. We will use this during the configuration of the EF Core provider to map your .NET objects to each collection in the Couchbase database.

Creating Cluster Access

In the Capella Operational Cluster view, click on “Settings” at the top of the page and then “Cluster Access” and create a Cluster access name and a password, then give it the Bucket-Level access needed to access the “Content” Bucket and perform CRUD operations:

You can choose any name and password that you would like.

Network Access

In the Capella Operational Cluster view, click on “Settings” at the top of the page and then “Allowed IP Addresses” and give your public IP access to the Content Bucket.


Either add your own IP address or allow access from anywhere.

Creating the Application

As an example, we will create a simple application for performing CRUD and Linq to SQL queries against the Couchbase Bucket “Content”. We will start by creating a .NET Console Application project called “blog-engine”.

The Console Application Project

Open a terminal and type the following into it:

> mkdir blog-engine
> cd blog-engine/> dotnet new console

These commands will create a directory called “blog-engine” then navigate into it before creating a new .NET Core Console application of the same name. 

Next we will add the dependency to the Couchbase.EntityFrameworkCore NuGet package.  Type the following command into the terminal:

> blog-engine % dotnet add package Couchbase.EntityFrameworkCore –version 1.0.0-pre.1
> ls
> Program.cs blog-engine.csproj obj

The Blog and Post Entities

Using the editor of your choice, in this example we will use Visual Code, create a new file called Blog.cs and copy the following code into it:

public class Blog
{
    public string BlogId { get; set; }
    public string Url { get; set; }
    public List<Post> Posts { get; } = new();
}

Create another file called Post.cs and copy the following code into it:

public class Post
{
    public string PostId { get; set; }
    public string Title { get; set; }
    public string Content { get; set; }
    public string BlogId { get; set; }
    public Blog Blog { get; set; }
}


These two classes will be the .NET objects or entities that we will map to the Couchbase Keyspaces we defined in the earlier sections. We will now create the DbContext which brings these entities and the Couchbase database together.

The BloggingContext

Create a new file called BloggingContext.cs and add the following code to it:

using Microsoft.EntityFrameworkCore;
using Couchbase;
using Couchbase.EntityFrameworkCore;
using Couchbase.EntityFrameworkCore.Extensions;
using Couchbase.Extensions.DependencyInjection;
using Microsoft.Extensions.Logging;

public class BloggingContext : DbContext
{
    protected override void OnConfiguring(DbContextOptionsBuilder options)
    {
        options.UseCouchbase<INamedBucketProvider>(
    new ClusterOptions()
                .WithCredentials(“Administrator”, “password”)
                .WithConnectionString(“couchbase://localhost”),
            couchbaseDbContextOptions =>
            {
                couchbaseDbContextOptions.Bucket = “Content”;
                couchbaseDbContextOptions.Scope = “Blogs”;
            });
    }
}

You are creating a special DbContext object called BloggingContext that will be used to interact with the Couchbase database. The OnConfiguring method is used to inject the Couchbase SDK into the BloggingContext so that when you perform CRUD or run a query, code will execute against the Couchbase Keyspace which resides on the Cluster and Bucket that you created earlier in the first section.

At this point, you will need to customize the Credentials and Connection String that was created earlier. To do this copy the name and password that you created in the “Creating Cluster Access” section above and replace “Administrator” and “password” in the WithCredentials method of the code in the BloggingContext class. 

You will also need the connection string that was generated for you when you were setting up your Cluster and Access in the previous sections. You can find this by navigation to the Operation Cluster in the Capella view and then clicking on “Connect”:

Your Cluster will have a unique Connection String, so don’t use the one that is defined here as I am going to delete it very soon!

Take this ConnectionString and replace the “couchbase://localhost” Connection String in the BloggingContext class. 

The next step is to a DbSet properties and configure them so that they are aware of the Keyspace that was defined. To do this add two DbSet properties to the BloggingContext class:

public class BloggingContext : DbContext
{
    public DbSet<Blog> Blogs { get; set; }
    public DbSet<Post> Posts { get; set; }
    …
}

Then you will map the entities to the two Keyspaces

  • The Blog object will be mapped to `Content`.`Blogs`.`Blog` 
  • The Post object will be mapped to `Content`.`Blogs`.`Post`

We will do that in the OnModelCreating method in the BloggingContext:

public class BloggingContext : DbContext
{
  …
  protected override void OnModelCreating(ModelBuilder modelBuilder)
    {
        modelBuilder.Entity<Blog>().ToCouchbaseCollection(“Blog”);
        modelBuilder.Entity<Post>().ToCouchbaseCollection(“Post”);
    }
}

Once that is done, we have created the Couchbase Bucket, “Content”,  and we have mapped the .NET objects to their respective Keyspaces.

Using the BloggingContext

When the .NET Core Console Application was created in the “Console Application Project” section a file called Program.cs was automatically created. It contains a “main” method and is the starting point for the whole application. When the application runs, the code in that file will be executed and output written to standard output.

In the Program.cs file add the following code:

using var db = new BloggingContext();

This will create an instance of the BloggingContext, which will be used for both CRUD and Linq to SQL queries. Next add the following code to the Program.cs file:

var blog = new Blog
{
    Url = “http://blogs.msdn.com/adonet&#8221;,
    BlogId = Guid.NewGuid().ToString()
};
db.Add(blog);
db.SaveChanges();

Here we create a new Blog instance and add it to the BloggingContext, finally we call SaveChanges which commits the JSON form of the .NET object to the Couchbase Bucket “Content” and stores it in the `Content`.`Blogs`.`Blog` keyspace in that Bucket.

Now  that we have the Blog stored in the Bucket, we can read it back into the application:

blog = db.Blogs
    .OrderBy(b => b.BlogId)
    .First();

This is a very simple query which translates into something like this as SQL++: SELECT `b`.* FROM `Content`.`Blogs`.`Blog` as `b` ORDER BY `b.BlogId` LIMIT 1;”. The results of the query are then mapped to the Blog object.

Here is an example of an update on a Blog object, which also demonstrates a nested object::

blog.Posts.Add(
    new Post
    {
        Title = “Hello World”,
        Content = “I wrote an app using EF Core!”,
        PostId = Guid.NewGuid().ToString()
    });
db.SaveChanges();


Finally, we will remove the blog from the database:

db.Remove(blog);
db.SaveChanges();

Conclusion

I hope you enjoyed this introduction to the EF Core Couchbase DB Provider! It is still in early development, but as you can see it is very similar to any other EF Core Provider which makes it very easy to switch between databases as needed.